SHOOTOUT: VITTORIA AIR LINER VS CUSHCORE — MUCH MORE THAN A FOAM TIRE INSERT
Vittoria and CushCore improve tubeless

Thanks in large part to the arrival of tubeless tires and gravel bikes, much has changed not only in tire and rim design but prevailing notions of air-pressure technology. A tire’s air volume is the largest factor when it comes to running the proper tire pressure, and it can drastically alter how a bike performs. This seems counterintuitive to what we have been taught over the years, but it is largely due to the static size of tires traditionally offered for drop bar bikes.
Thankfully, most modern road bikes have moved away from running the narrow 21–25mm tires in favor of 28mm as the new starting point. With gravel bikes, the norm is in the 38–40mm range. Add to that rims with wider internal widths that also impact the volume of air, and what we’re left with is a new age of improved tire performance.
With all this is mind, we are now learning that, like air suspension on bikes, the air volume in a tubeless wheel can be manipulated to offer more precise tire responses. This is where tire inserts come in and add many layers of advantages for those willing to experiment.

THE TECH
Tire inserts are nothing new to the cycling industry. In the modern era, inserts got their biggest push when Michelin Tires introduced the secret “Le System” on the pro downhill mountain bike circuit in the late ’90s. Basically a foam mousse, the insert acted as a buffer between the rim and impacts, which made the difference between ruining a DH run and still being able to finish on a flat tire.
A side effect of adding this foam insert is it acts as a volume spacer. When maintaining the same pressure in the system but with a volume spacer, the result is a more progressive ramp in pressure when a tire is compressed during riding. What does that mean for the rider? The tire is still responsive to the smaller bumps and demands of cornering with very little difference, but, in the case of a larger impact, it would not deform as much. This is two-part, because not only does the tire not compress as far, but it also now has this insert to act as a physical barrier, too.
On gravel, this is extremely useful and could allow for riders to have more options in tire size. In some cases, the tire can be large but run at a lower pressure to maximize comfort, traction and efficiency over very rough terrain. In another case the rider might be able to choose a smaller tire to increase clearance for mud and debris. The smaller tire would also benefit from lower pressures and more progressive compression. In either case, the risk of being too low is minimized since the foam insert helps protect the rim.
For our test we chose two of the most popular and refined systems on the market—CushCore and Vittoria. CushCore has a full line of mountain bike offerings in different wheel and tire sizes. Vittoria takes a slightly different approach and offers a system that is more universal and will fit a wide range of tire and wheel sizes.
THE SETUP
CushCore
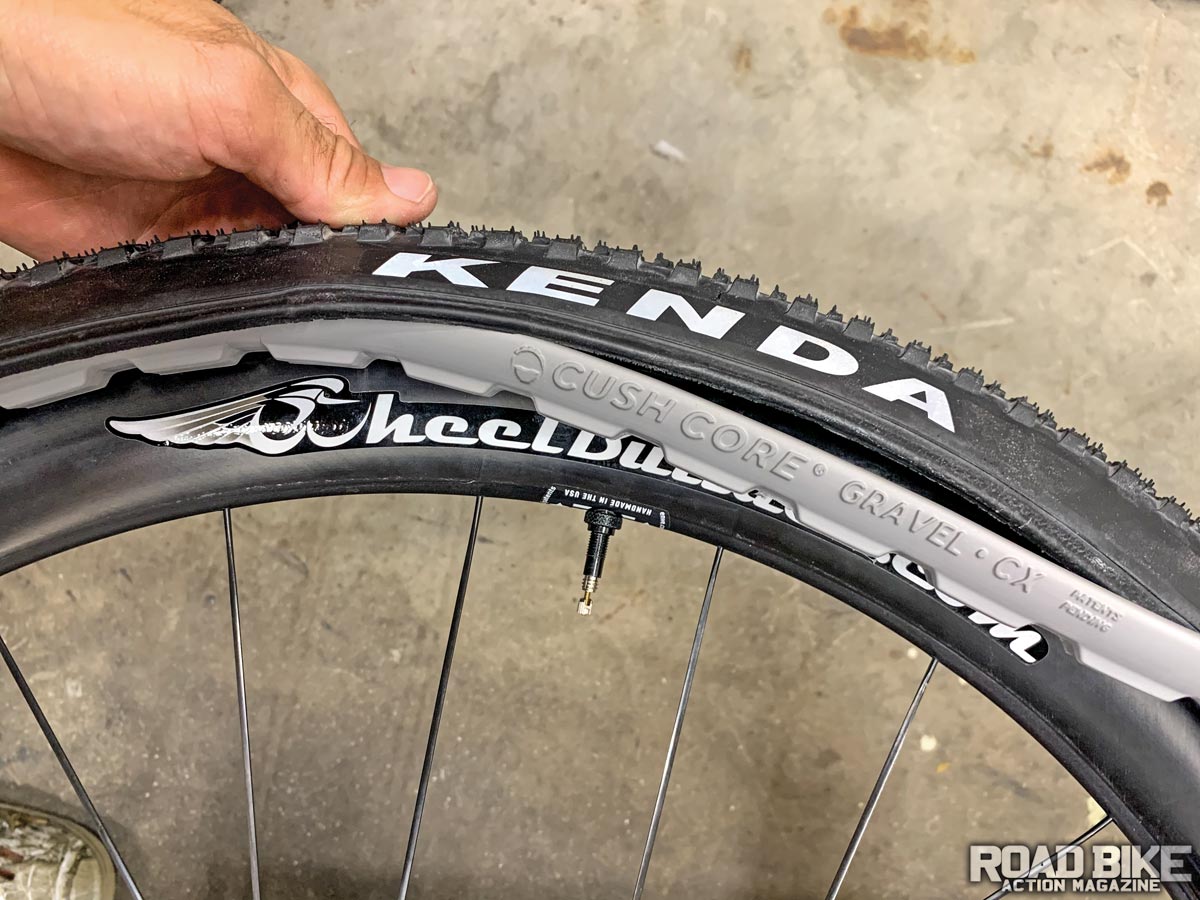
The Gravel.CX kit consists of two foam inserts that are made to fit a 700c rim. There are also two 44mm Presta valves that are specifically designed for tire inserts. The valves are specific on the rim side with holes on the sides, in addition to the one at the end (like a normal valve). This is to allow better airflow in case the insert covers the hole on the end. If you’re rolling on 650b wheels, you should opt for the XC mountain bike kit.
The continuous foam insert is 38mm at its widest, 14.5mm at the narrow rim side and varies from 12.8mm to 15.5mm in thickness. Each insert weighs 122 grams. The fit is fairly tight on all the wheels we tested, but nothing like the mountain bike versions, which are known for their difficulty to install. CushCore recommends the Gravel.CX kit for internal rim widths of 19–26mm and tire widths from 33–46mm.
“Best of all, with the lower air pressures we were able to enjoy increased traction without the worry of damage to a wheel or tire.”
The setup was pretty easy, and we installed our tubeless tire on the wheel dry (no sealant) and beaded up the tire. Make sure you install the supplied valve, or in our case we needed to order the 55mm version to fit our Enve 3.4AR wheels. Next, we pulled one side of the tire off while the other remained beaded and loaded the foam insert.
The hardest part is reinstalling the tire under the CushCore. As you work your way around, you need to tuck the tire under the foam insert to get it into the drop center of the rim. Once it is all on, then it’s like any other tubeless tire. Air it up to seat the bead. We prefer to then deflate the tire, remove the valve core and add the sealant through the valve. This normally results in less mess.
Vittoria
Vittoria also offers a system for both mountain and gravel bikes. The Air-Liner Gravel is the kit sold for individual wheels, and each kit comes with one foam insert that is 220cm long. The kit also includes a zip-tie used to connect each end of the foam insert, as well as a special Presta valve. Similar to CushCore, the Vittoria valve has additional holes on the sides that they call a three-way tubeless valve. Lucky for us, their kit valve is 60mm long, and if you need one that’s longer, they offer valve extenders.
The foam insert itself is very light, and the full length supplied hit the scales at 51 grams. The insert is 24mm at its widest, 17.5mm at its narrowest (rim side) and 18.5mm tall. The supplied zip-tie is long, and we cut more than half of it off. Vittoria recommends their system for 700c wheels, but because it is a cut-to-fit system, it would also fit 650b. They don’t specify inner rim widths, but we would say 19–24mm would probably be best. For tires, they recommend 31–40mm for best results.

The install of the Vittoria Air-Liner has a few more steps, as you have to measure and cut the foam to fit. Start by installing the three-way valve, then wrap the foam insert over the rim you are going to use with no tire installed. Make sure it is tight but not being stretched, and mark the insert with a marker a few millimeters short of where they overlap.
Then simply cut at your marked line, removing the extra length of foam. For our install, we cut 23cm off, leaving us with 197cm. Then, using a small screwdriver or punch, poke a hole in the foam about 5cm in from each end. This will be for the supplied zip-tie to run through and connect the ends. The tie doesn’t need to be super tight, but you do want it to be tight enough to hold the two ends together.
Next, we used the same process as we did with the CushCore by installing the tire on the wheel dry (no sealant) and with no insert. We then removed one side of the tire while leaving the other bead mounted in place. Then we installed the Air-Liner and the other side of the tire. It is a bit easier than the CushCore, since the overall width and volume of the Air-Liner is less. After setting the bead and having the tire mounted on both sides without sealant, we added it through the valve for another mess-free installation.

THE RIDE
CushCore
The volume of space and size of the CushCore is significant, and the foam contacts the side of our 40mm tire. Adding air and adjusting pressure is easy, just make sure you have the valve up and away from the sealant that will pool at the bottom when adjusting pressure. This should always be the case with tubeless so that you don’t get sealant coming back out of the valve, but with the added holes in the valve, it is even more important.
To start, we ran our normal pressure for the same wheel and tire combo of 33 psi in the front and 34 psi in the rear. It was obvious immediately that with the reduced air volume the tire was much stiffer when compressed. So much so, we went back and installed our trusty Quarq TyreWiz’s so we could monitor our pressures live. The added progression was so drastic that after only a few miles of rough roads we started to try lower pressures.
We went to 30 psi, then 25 psi, then 20 psi. Yes, we went to 20 psi with surprisingly good results. We did have a few impacts that sent the foam into the ground, but due to its width and shape, our rim itself never contacted the ground. The lower pressure provided much better traction in corners and braking, while the shape of the insert almost supported the sidewall.
Vittoria
The Air-Liner is a smaller insert that really sits in the bed of the rim and protrudes a few millimeters past the
bead wall of the rim. It takes up less space in the tire, reducing its effect as a volume spacer. This isn’t better or worse, but offered a different rate of progression. Running our normal pressures of 33 psi and 34 psi, the response of the tire was faster on impacts but felt more traditional.
As we started to use lower pressures, the effect became more noticeable since traction and compression increased but didn’t feel squishy like it normally would with the lower pressures. Cornering and small-bump compliance were increased, but there was still a good level of support for big bumps and impacts. We definitely bottomed the rim out on the tire a few times when at 20 psi, but between the foam buffer and added progression rate, it was a soft touch rather than a day-ending rim strike that could break a rim or cut a tire.
Cornering and braking were improved, but we did feel that there was less sidewall support at the lowest pressures. This led us to run more pressure in the Vittoria system, but still lower than what we would opt for without the insert. We didn’t really notice any added weight from the Air-Liner over not having any insert.
THE VERDICT
Both systems are very interesting and did affect our riding a lot more than we expected. The increased progression and ability to choose lower pressures added confidence to all of our rides, dirt or paved. Best of all, with the lower air pressures we were able to enjoy increased traction without the worry of damage to a wheel or tire.
Both systems add weight to your wheels, but in all honesty, we never noticed it. If weight is a concern, there are a few things to consider. First, Vittoria’s Air-Liner system weighs less than one CushCore insert. On the flip side, if you are the type that gets a lot of flat tires or really gets rowdy through rock sections, owing to its width, the added volume and protection CushCore offers is unmatched. You also wouldn’t need to bring any spare tubes, since both claim you can ride them with a flat tire for over 100 miles.
We tested the run-flat ability of both, and while it is true the inserts definitely help, the CushCore seems to offer more rim protection. Both inserts seem to have the same durometer foam, but the CushCore has a smooth finish while the Vittoria is a bit rougher. When we did this test, we rode 20 miles at a less aggressive pace than we normally would ride, but not nearly like we would if we had no inserts and double flat tires. Overall, we would confidently head out for a gravel ride without a spare tube if we had either of these inserts installed.
Running the same pressure as we would without the inserts offered feedback that was better on the pavement than compared to when the road turned to dirt, we immediately felt like we should drop the pressure. The CushCore felt like we could drop more pressure than the Vittoria safely, but both felt best around 25–27 psi when normally (without inserts) we’d opt for the low 30s. Neither seems to absorb sealant, meaning that they should last a very long time without acting as a sponge. Either way, one of the two systems will likely be installed on our bikes from now on when we take on gravel events—that is when they start happening again.
CUSHCORE PUNCH LINES
More foam for more progression
Heavier and more expensive
Get rowdy protection
VITTORIA PUNCH LINES
Universal fit
Need to buy one for each wheel
Light and effective
CUSHCORE STATS
Price: $149
Weight: 244 grams (both inserts)
www.cushcore.com
VITTORIA STATS
Price: $35 each ($70 total)
Weight: 94 grams (both inserts)
Comments are closed.